Host with Nginx—because configuring web servers is what every cybersecurity professional dreams of doing after hours 😎
Step 1: Setting up Your Server - Welcome to SysAdmin Hell👽
So, I spilled all my secrets,confidential data here, but don’t worry! By the time you’re reading this, I’ve already hit the big red “delete/purge” button. It was all just for the blog, to show you the full drama of how things work from start to finish. Enjoy the show!
1.1 Choose and Install an Operating System:
- Oh, the joy of picking an OS! Let's go with Ubuntu, because why not make life easy for once😉?


Step 2: Install Nginx - The Web Server That Loves to Serve🤪
2.1 Install Nginx:

2.2 Start Nginx:

2.3 Enable Nginx on boot:

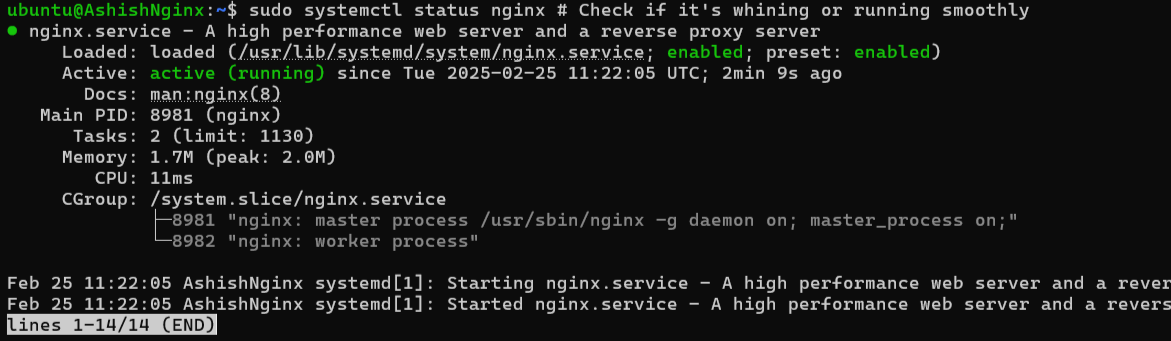
2.4 Verify Nginx is running:
Step 3: Using A Records with Cloudflare for SSL:
3.1 Setup in Cloudflare:

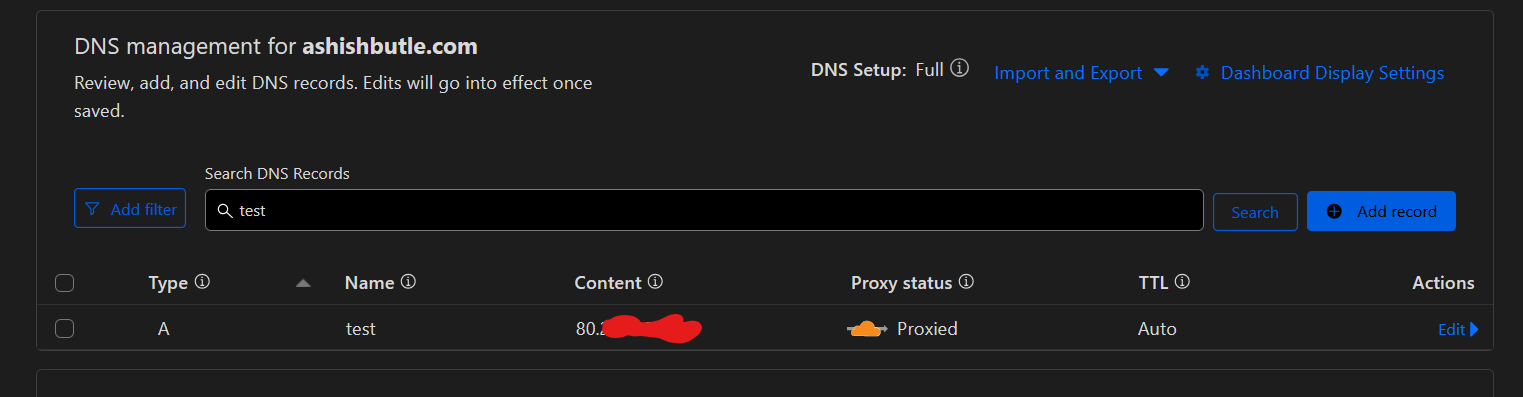
3.2 Create A Records:
- Go to the DNS section in your Cloudflare dashboard.
- Add or edit an A record for your domain. For example:
- Name: test.ashishbutle.com or leave blank for the root domain
- IPv4 address: Your server's public IP address
- Proxy status: Orange cloud (to proxy through Cloudflare)
- If you want to support www.yourdomain.com, create another A record:
- Name: www
- IPv4 address: Same as above
- Proxy status: Orange cloud
3.3 SSL with Cloudflare:
- Universal SSL: Cloudflare automatically provides and manages SSL certificates for your domain and its subdomains when you use the orange cloud (proxy). This means:
- You don't need to manually set up SSL certificates on your server for Cloudflare to serve HTTPS.
- Cloudflare will handle SSL handshakes, encrypting traffic between the visitor and Cloudflare.
- Full or Full (Strict) SSL:
- Go to SSL/TLS > Overview in your Cloudflare dashboard.
- Set the SSL encryption mode to "Full" or "Full (Strict)" to ensure encryption between Cloudflare and your origin server as well.
Step 4: Configure Nginx - The True Art of Misconfiguration🎭
4.1 Create Directory for Your Blog:

4.2 Upload Your Template🖼️:Where the Real Fun Begins😝
Now, put your blog files in there. Use SCP✂️ or any carrier pigeons🦅
Creating an index.html file with below code for testing.
<!DOCTYPE html>
<html lang="en">
<head>
    <meta charset="UTF-8">
    <meta name="viewport" content="width=device-width, initial-scale=1.0">
    <title>Welcome to Your Nginx Server</title>
</head>
<body>
    <h1>Welcome!</h1>
    <p>Congratulations, you're no longer a noob in hosting and Nginx! This is your index page, served by your very own Nginx server.</p>
</body>
</html>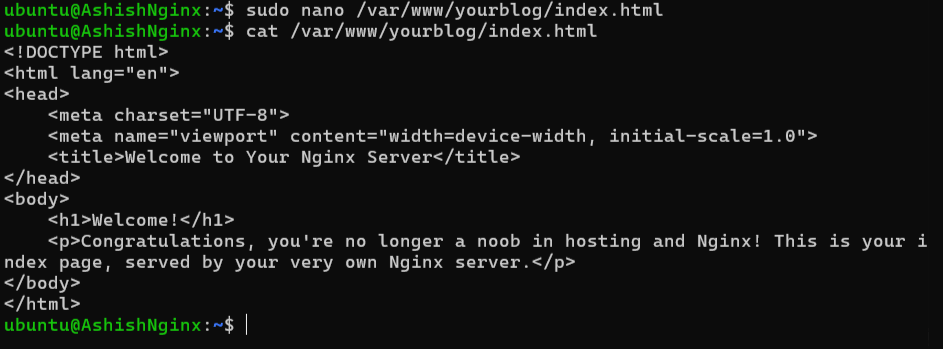
4.3 Set permissions:


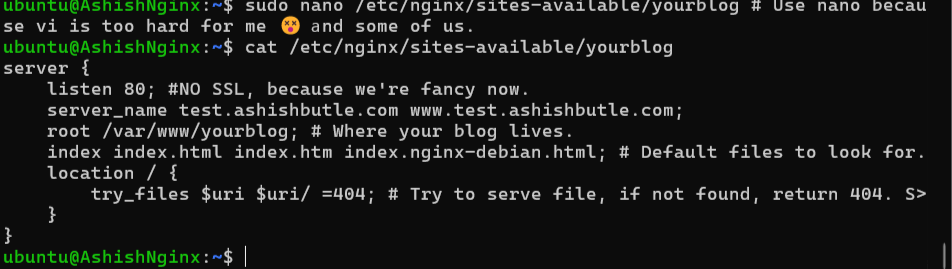
4.4 Nginx Configuration:
4.5 Here's where you'd paste your config, but let's just say:
server {
    listen 80;
    server_name test.ashishbutle.com www.test.ashishbutle.com;

    root /var/www/yourblog; # Where your blog lives.
    index index.html index.htm index.nginx-debian.html; # Default files to look for.


    location / {
        try_files $uri $uri/ =404; # Try to serve file, if not found, return 404.
    }

    # Logging, because you never make mistakes.
    error_log /var/log/nginx/error.log;
    access_log /var/log/nginx/access.log;
}
4.5 Link the config to sites-enabled:

4.6 Test Nginx Configuration:


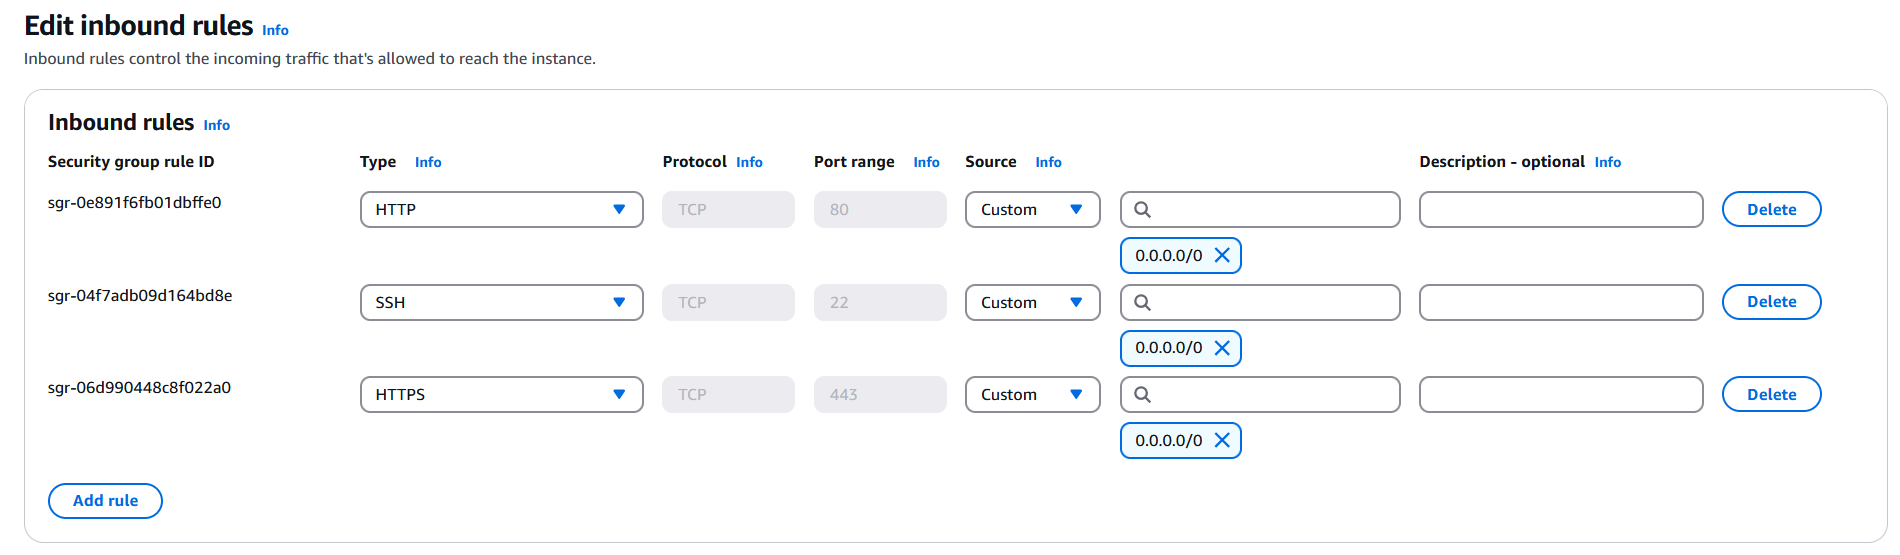
Step 6: Security - Because We All Know It's Optional😜
6.1 Firewall: 🔏
2) Oracle Cloud>>Security List>>Open HTTPS 443/80,
3) sudo ufw allow 'Nginx Full' # Allow Nginx through the firewall, because what's security without open ports?
6.2 Regular Updates:
Keep everything updated because outdated software is like an open invitation for hackers📩.
6.3 Logs:
7 Conclusion
Now your blog is up, secured with HTTPS, and using your custom template. Remember, in cybersecurity, every day is a new adventure in finding out what you've missed. Keep your system updated, your certificates renewed, and your logs checked. Because in the world of cybersecurity, complacency is your real enemy.
Happy blogging, and may your server logs be ever in your favor!
