Modern Windows Autopilot Enrollment: From Risky CSVs to Secure Pipelines vie PowerShell
Adding devices to Windows Autopilot used to mean exporting a special ID (the hardware hash) into a CSV file and then manually uploading that file into Intune. It works, but it’s slow, easy to mess up, and not great from a security point of view because that CSV can be copied, shared, or left lying around on someone’s laptop.
The following method is much simpler: you run a small PowerShell command on the device and it sends the hardware hash directly to Intune over a secure, logged connection. No CSV, no manual uploads, and far less chance of someone mishandling that data. For a new IT person, the key idea is: instead of “export file ->upload file,” you now do “run command -> device appears in Intune,” which is faster, safer, and easier to repeat at scale.
End-to-end Youtube video demonstration included at the bottom of this post: OOBE setup, hash generation, Intune registration, and provisioning.
Prerequisites (Yeah, You'll Need These)
- Intune Administrator role (or just accept your fate with a Global Admin account nobody's judging)
- Windows 11 device (physical or VM)
- Internet connectivity (surprisingly important for cloud stuff)
- Valid Intune license (no free trials, sorry)
- Azure AD tenant with brain cells intact
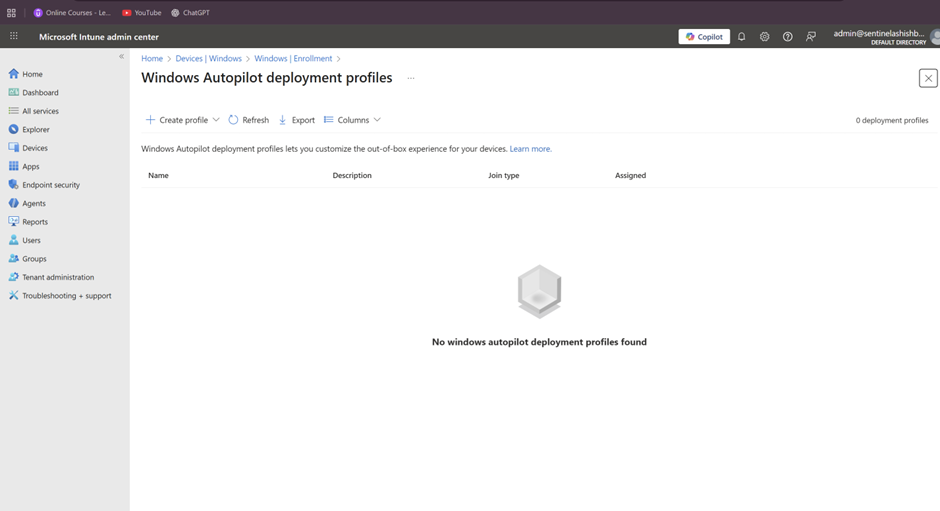
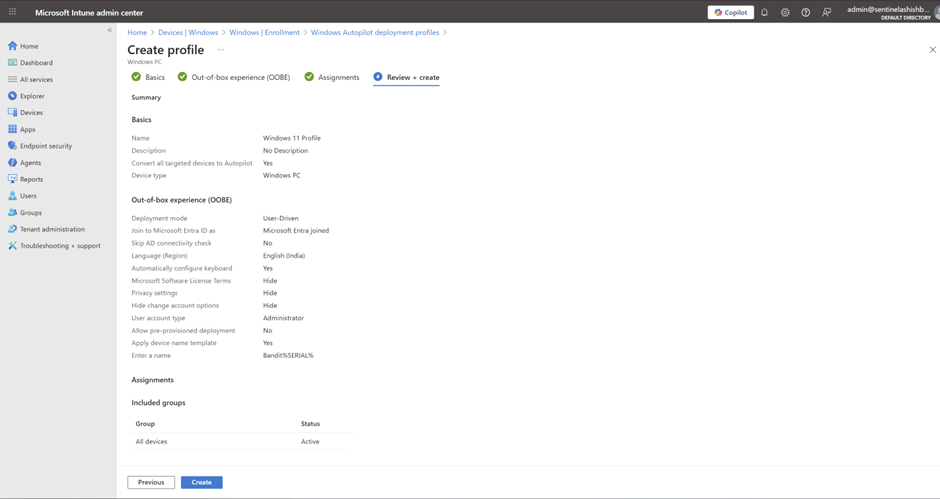
Step 1 : Create a Deployment Profile (The Autopilot Blueprint) In Microsoft Endpoint Manager
- Go to Devices > Windows > Enrollment > Windows Autopilot Deployment Program > Deployment profiles
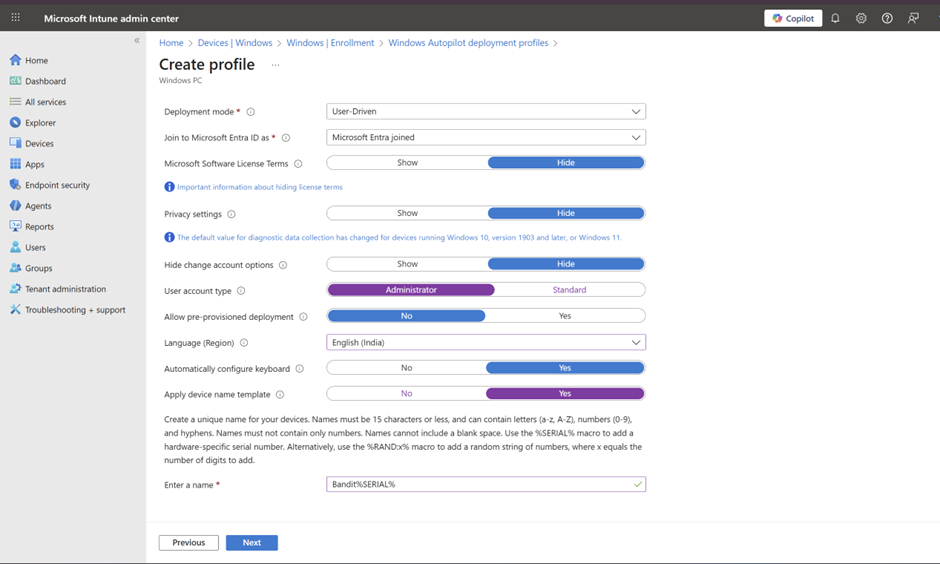
- Click + Create profile > Windows PC
- Name it something memorable (e.g., "Standard-User-Driven")
- Set to User-driven mode
- Join as: MS Entra joined
- Configure OOBE settings:
- Hide privacy settings? Yes.
- Hide MLST? Yes
- Hide change account optins? Yes
- Disable local admin? For security theater, yes.
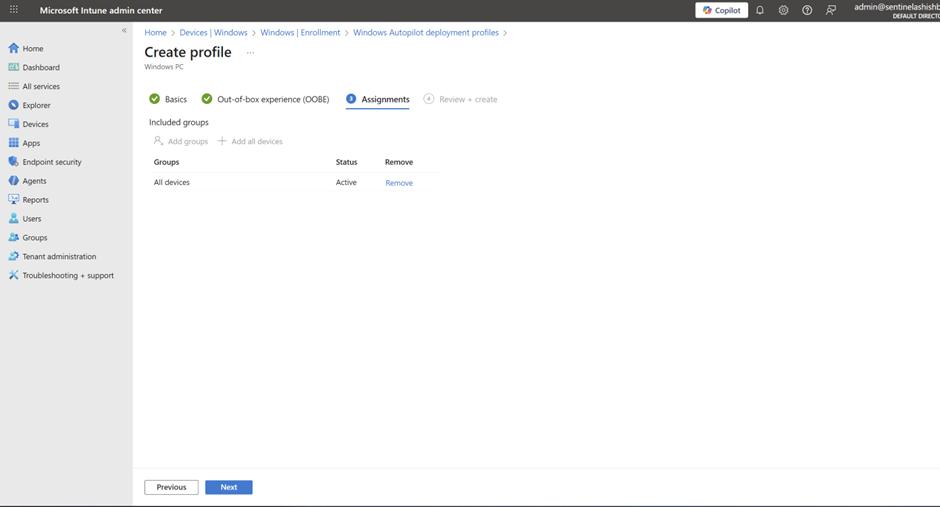
- Assign to an Azure AD group containing actual humans
- Click Create
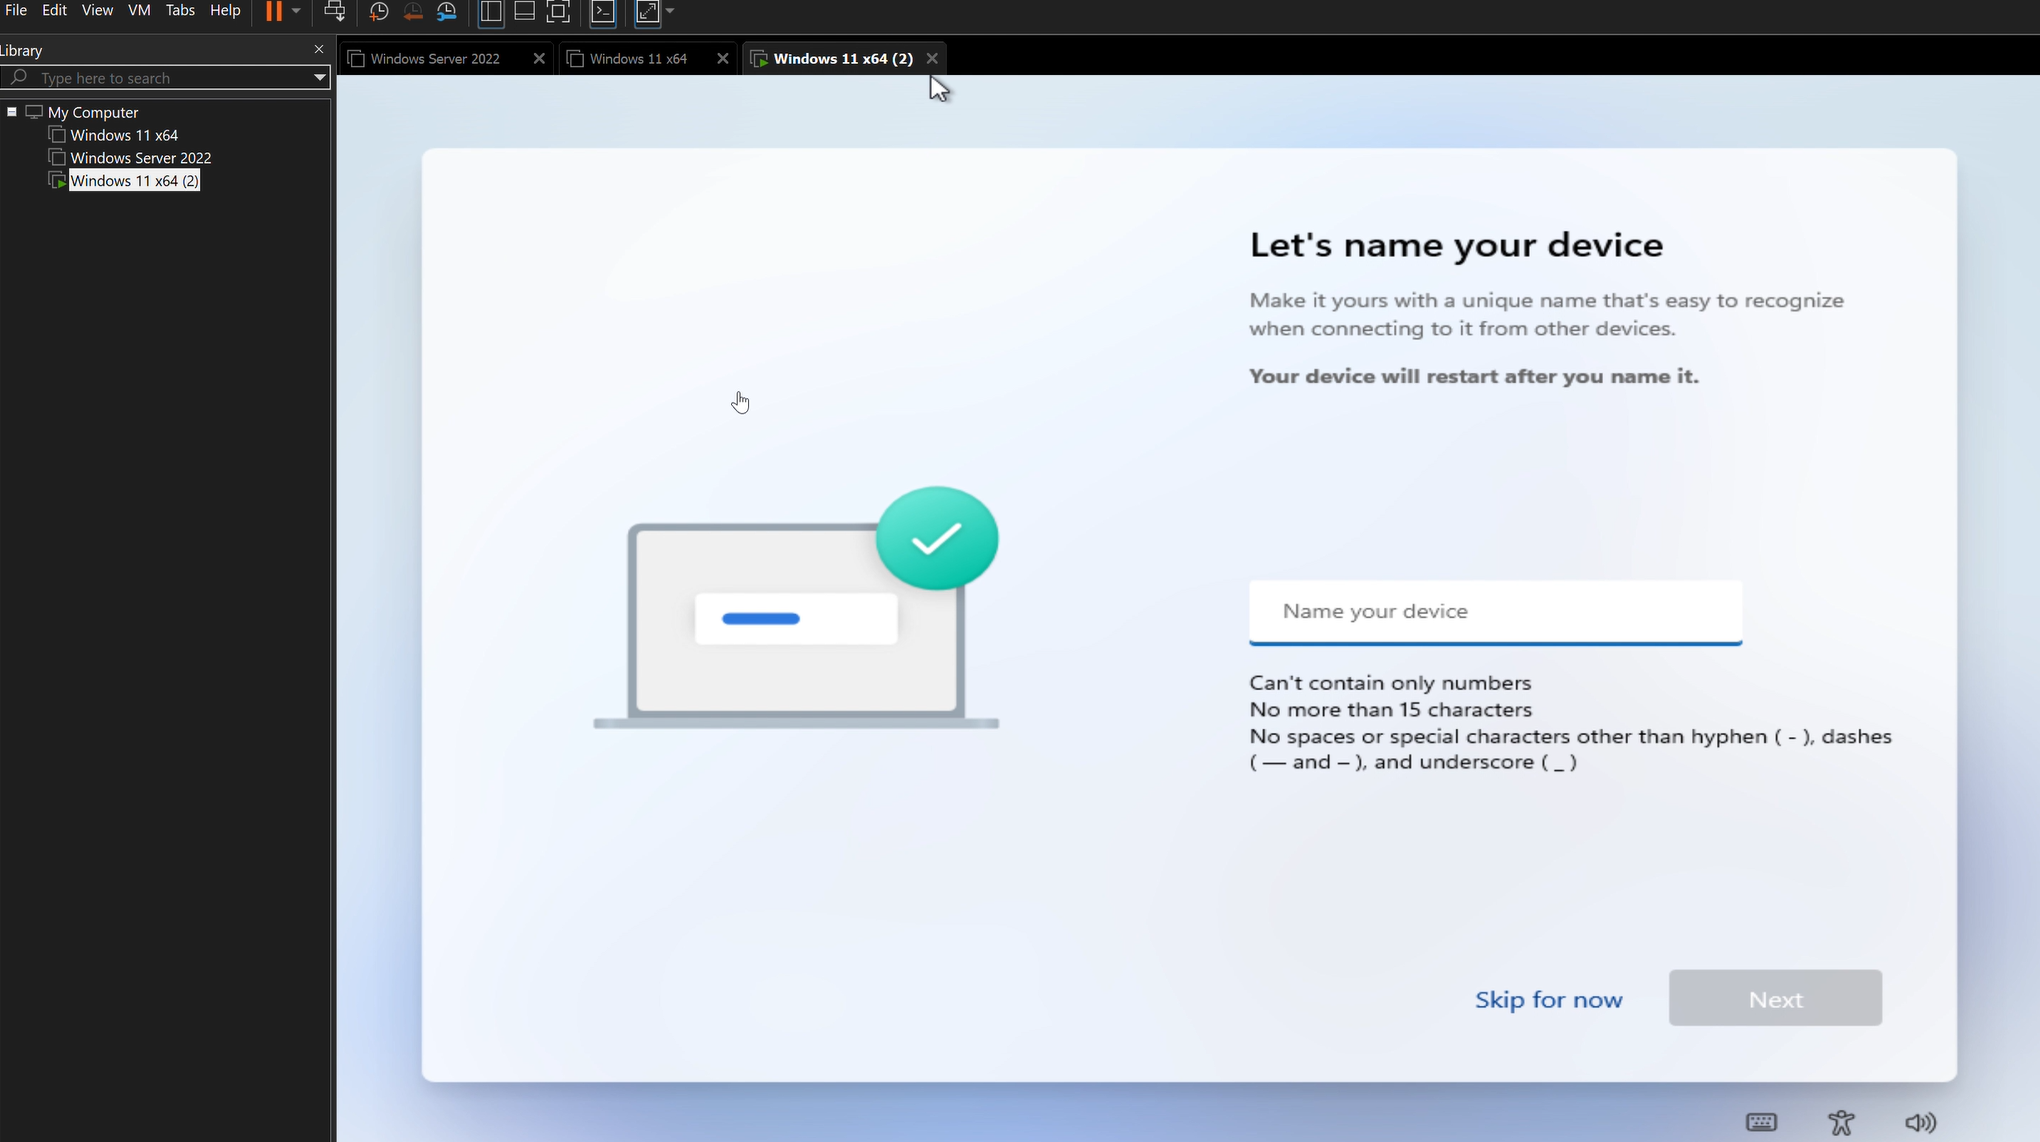
Step 2: Boot Into OOBE and Break Out of Jail
- Power on your Windows device "Physical or VM" at the OOBE screen
- Press Shift + F10 (or Shift + Fn + F10 if your keyboard hates you)
- Command Prompt appears like magic
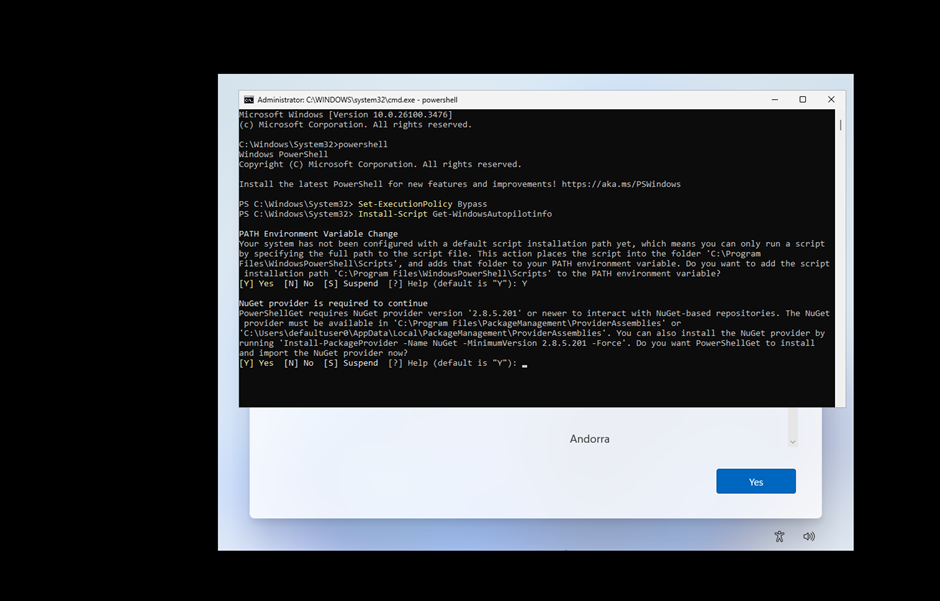
- Type PowerShell and hit Enter
powershell
Step 3: Trust Nothing, Execute Everything
In PowerShell, run these commands in order:
Set-ExecutionPolicy Bypass
Install-Script Get-WindowsAutoPilotInfo
Step 4: Upload Hardware Hash Directly to Intune (The Modern Way)
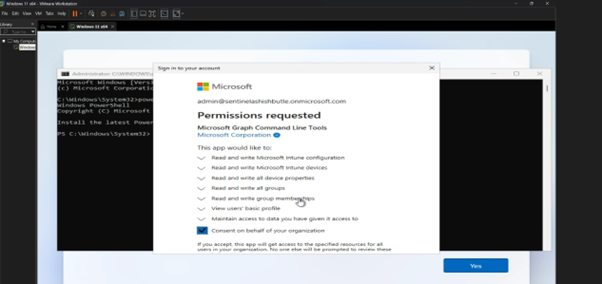
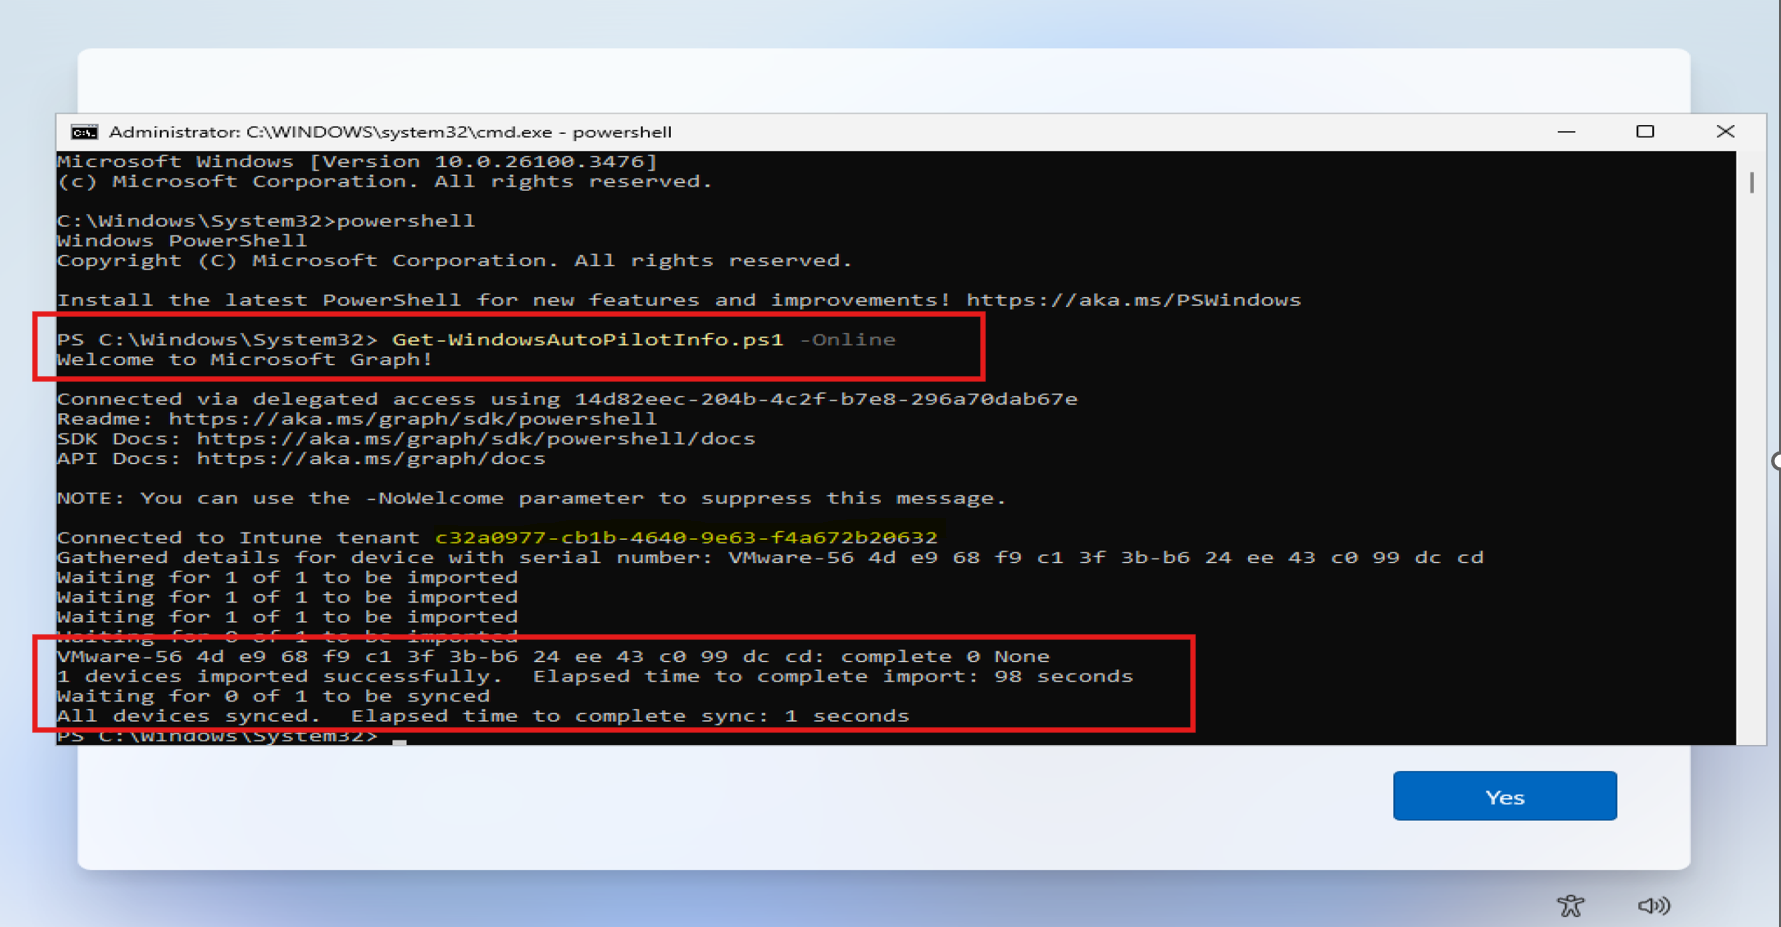
Get-WindowsAutoPilotInfo.ps1 -Online
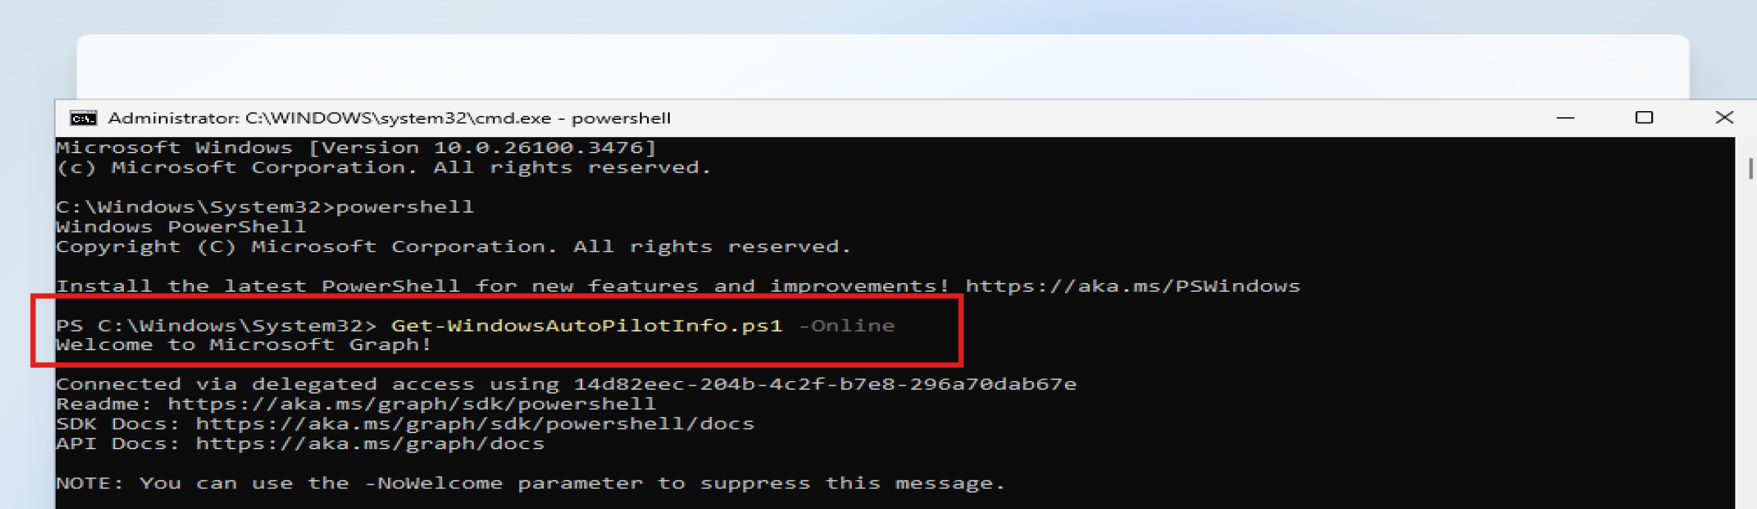
What happens:
- Azure AD auth prompt appears
- Sign in with your Intune Admin account
- Script generates hardware hash
- Device uploads to Intune automatically
- Profit (no CSV involved)

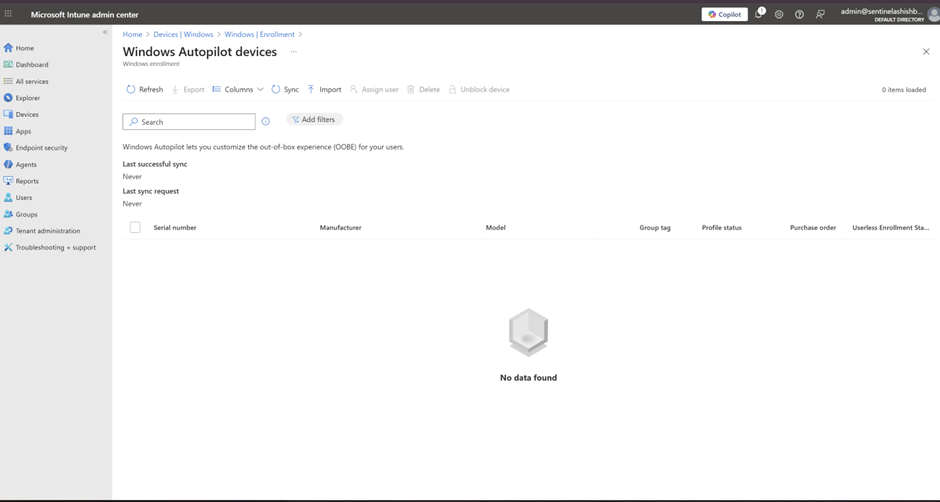
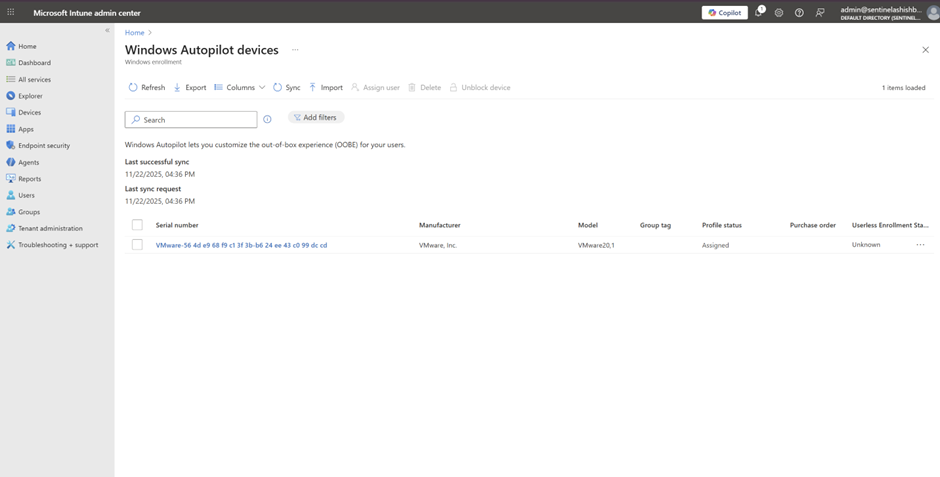
Step 5: Check Intune portal: Devices > Windows > Enrollment > Windows Autopilot Deployment Program > Devices
Your device should appear in 1-2 minutes. If it doesn't, either:
- Your permissions are wrong
- Your internet is broken
- Microsoft is having a Tuesday
Step 6: Reset OOBE and Deploy (The Moment of Truth)
In the same command prompt on your device, run:
shutdown -r -t 0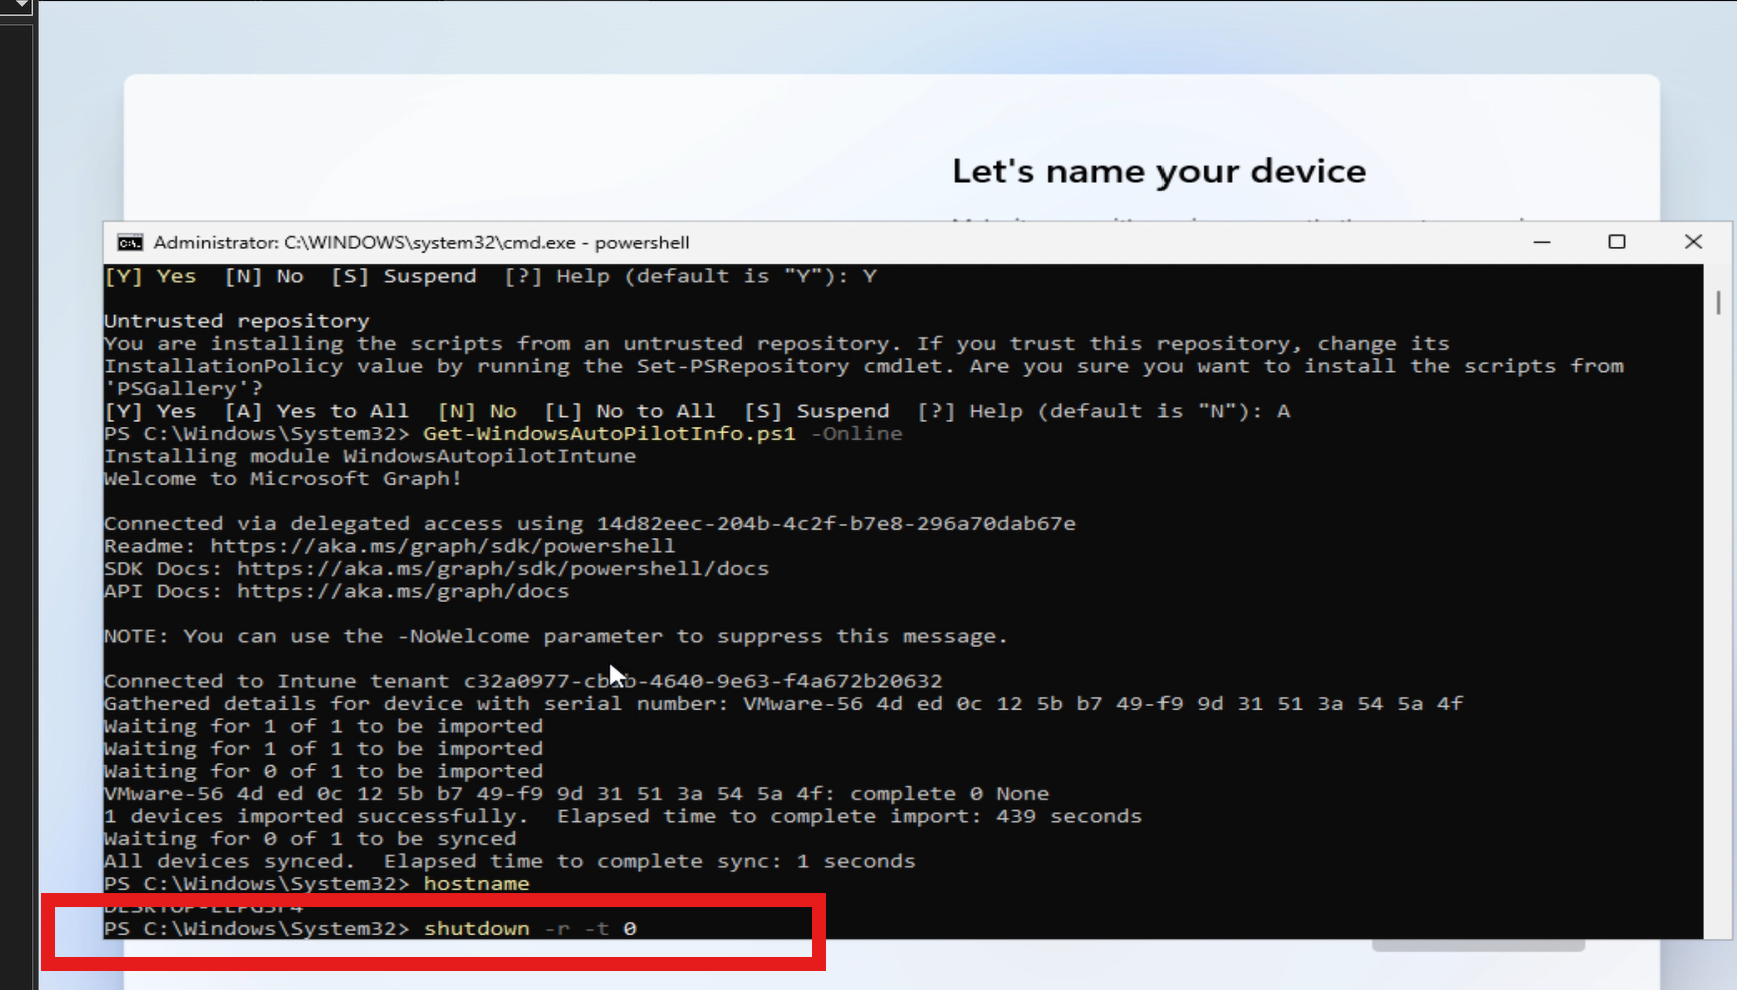
Step 7: Reboot and Watch the Magic (Or Debug the Chaos)
Once the device Power on the device again. This time:
- OOBE loads (but different this time it has a plan)
- Profile downloads from Intune silently
- Region/Keyboard screen appears (auto-filled if you configured it)
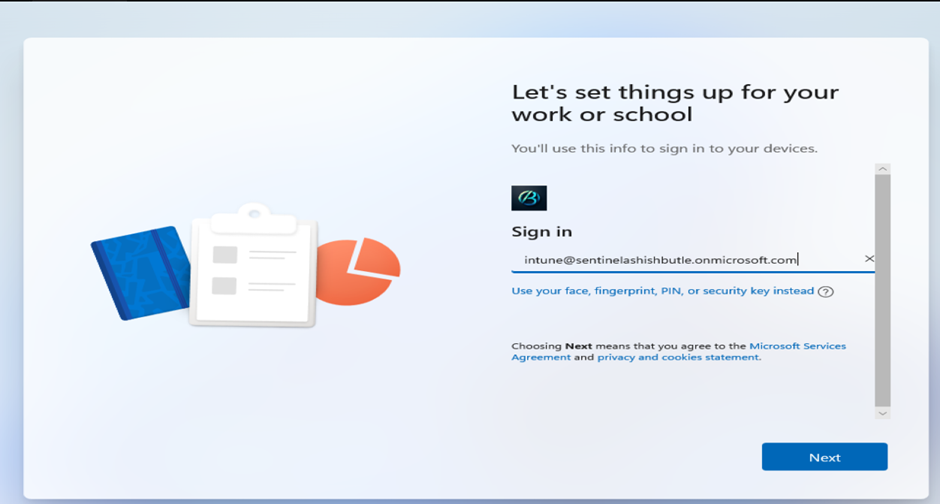
- Azure AD sign-in appears
- User enters credentials
- MFA prompt (if you're paranoid and you should be)
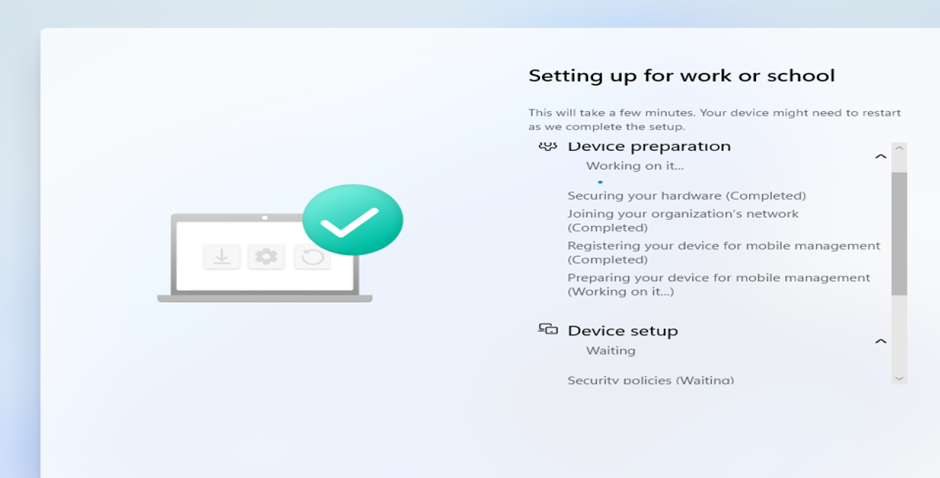
- Device joins Entra ID
- MDM enrollment happens automatically
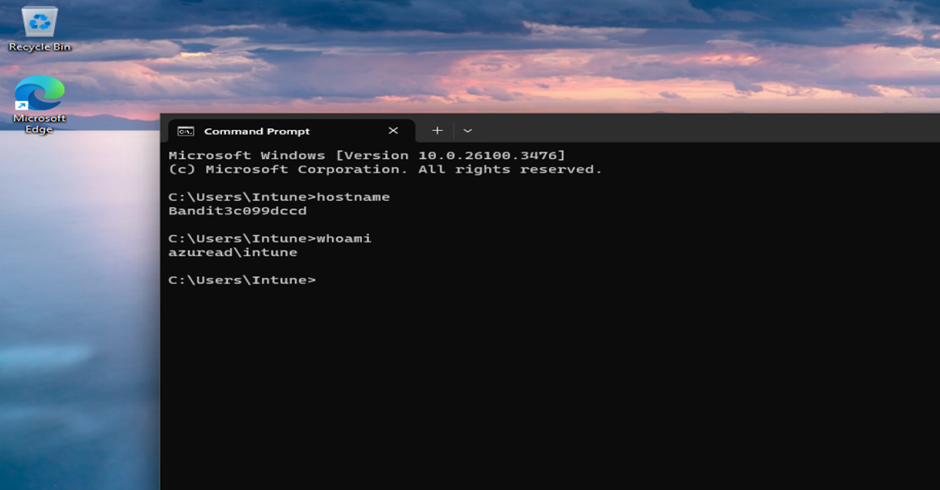
- Device is ready
- Everyone's happy (except the CSVs you didn't create)
End-to-end video demonstration of Windows Autopilot