WireGuard: Because Who Needs Friends When You Have Encrypted Packets😉?

Step 1: Get Your Machine Ready (Because Chaos Isn’t an Option Yet) Welcome to SysAdmin Hell👽
So, I spilled all my secrets,confidential data here, but don’t worry! By the time you’re reading this, I’ve already hit the big red “delete/purge” button. It was all just for the blog, to show you the full drama of how things work from start to finish. Enjoy the show!
1.1 Choose and Install an Operating System:
- Oh, the joy of picking an OS! Let's go with Ubuntu, because why not make life easy for once😉?
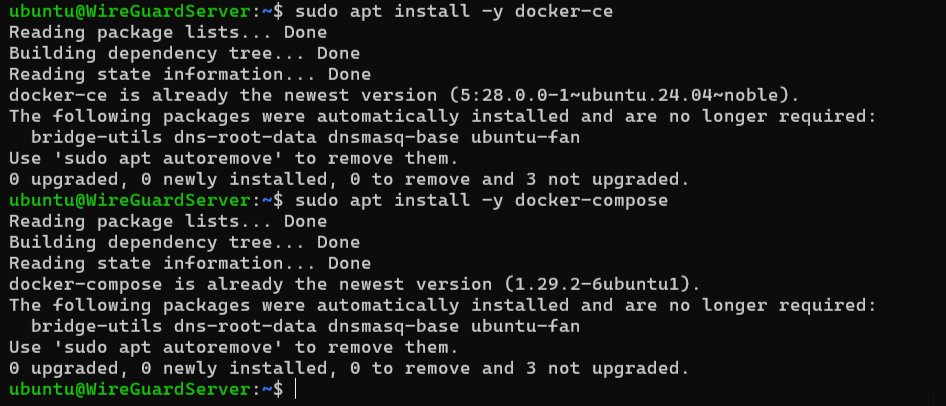
1.2 If you have choose Linux machine (Ubuntu, let’s say, because it’s the people’s champion), open your terminal. Type this to install Docker:
Install required packages:

Add Docker’s official GPG key:
sudo mkdir -p /etc/apt/keyrings
curl -fsSL https://download.docker.com/linux/ubuntu/gpg | sudo gpg --dearmor -o /etc/apt/keyrings/docker.gpg
Set up the Docker repository:
echo "deb [arch=$(dpkg --print-architecture) signed-by=/etc/apt/keyrings/docker.gpg] https://download.docker.com/linux/ubuntu $(lsb_release -cs) stable" | sudo tee /etc/apt/sources.list.d/docker.list > /dev/null

Update the package index again:

sudo makes you feel like a tech god, It’s just giving you permission to boss the system around. The -y means “yes, do it, I’m too lazy to confirm.”
1.3 Start Docker and make sure it’s not napping on the job:

This tells Docker to wake up now and every time the system boots. No slacking allowed, Docker!
Run docker --version. If you see something like “Docker version 20.whatever,” you’re golden. If not, well, you’ve already messed up—congrats, genius.

1.3 Add Yourself to the Cool Kids’ Club (Docker Group)
By default, only the “root” user (the supreme overlord of your system) can boss Docker around. We’re adding your regular user to the “docker” group so you don’t have to keep typing sudo like a begging for scraps.

$USER is just a fancy way of saying “you, yes, YOU.” This command is basically your VIP pass to the Docker party.
Make It Stick: Log out and back in (or reboot if you’re feeling dramatic):
Then log back in. Test it with docker ps—if it doesn’t yell “permission denied,” you’re in the club.
1.4 Grab Docker Compose (The Lazy Person’s Best Friend)
Docker Compose is like a recipe book for Docker. Instead of manually typing a million commands, you write one file, and it does the heavy lifting. We need it to juggle WireGuard and its GUI together.
Install Docker Compose by running:
Run docker-compose --version. If it spits out a version number, you’re winning at life. If not, you’re cursed—try again.
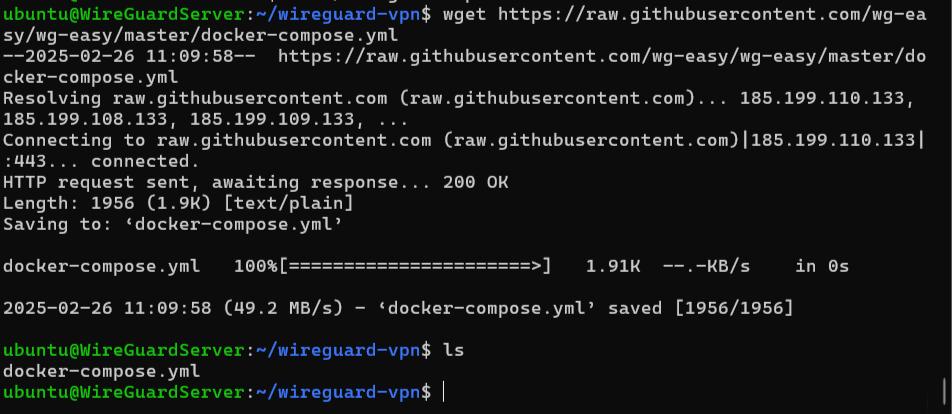
1.5 Set Up Your Secret HQ (Create a Directory)
We need a spot to store our VPN files, like a secret filing cabinet for your spy gadgets. This keeps everything organized and away from hacker eyes.

~ is your home directory—think of it as your Batcave. You’re now standing in your shiny new HQ.
1.6 Write the Magic Recipe (Docker Compose File)
This is where we tell Docker how to build our VPN empire. We’re using “WG-Easy,” a Docker image that bundles WireGuard with a nice GUI, because who has time to fiddle with config files manually?

- <YOUR_SERVER_IP>: Your server’s public IP (e.g., 203.0.113.10) or a domain like wg.ashishbutle.com.
- <YOUR_PASSWORD>: Something strong for the GUI login—like SuperSecret007.
- <PORT TCP=51821>: To access GUI
- <PORT UDP=51820>: secure network connections between devices over the internet
This file is your VPN blueprint. Mess it up, and your tunnel collapses like a bad spy movie plot.
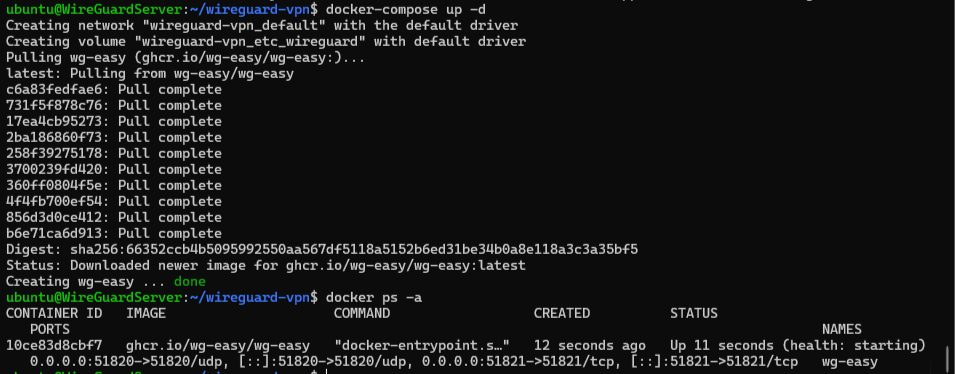
1.7 Launch the VPN
Docker Compose reads your recipe and fires up WireGuard with its GUI. It’s creating a secure tunnel and a web interface to manage it—all in one go.
The -d means “detach,” so it runs in the background while you sip coffee and pretend you’re a tech mastermind.
Run docker ps. You should see “wg-easy” listed. If not, you’ve angered the Docker gods—check your file again.
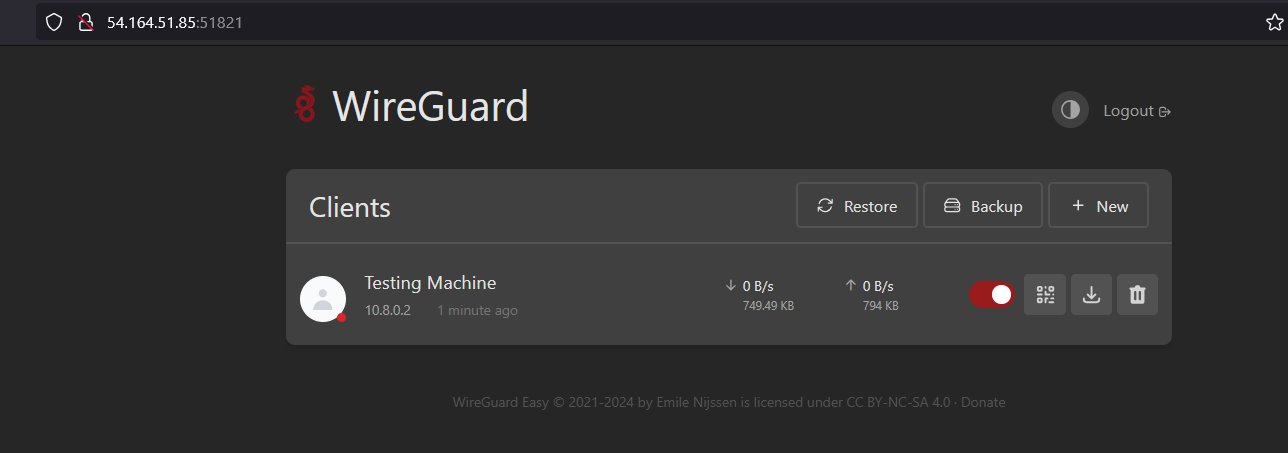
1.8 Open the Spy Dashboard (GUI Time!)
he GUI is a web page where you can add “clients” (devices that connect to your VPN). It’s running on port 51821, and WireGuard itself is on 51820.
Open a browser and go to http://<YOUR_SERVER_IP>:51821. Log in with your password from Step 1.6
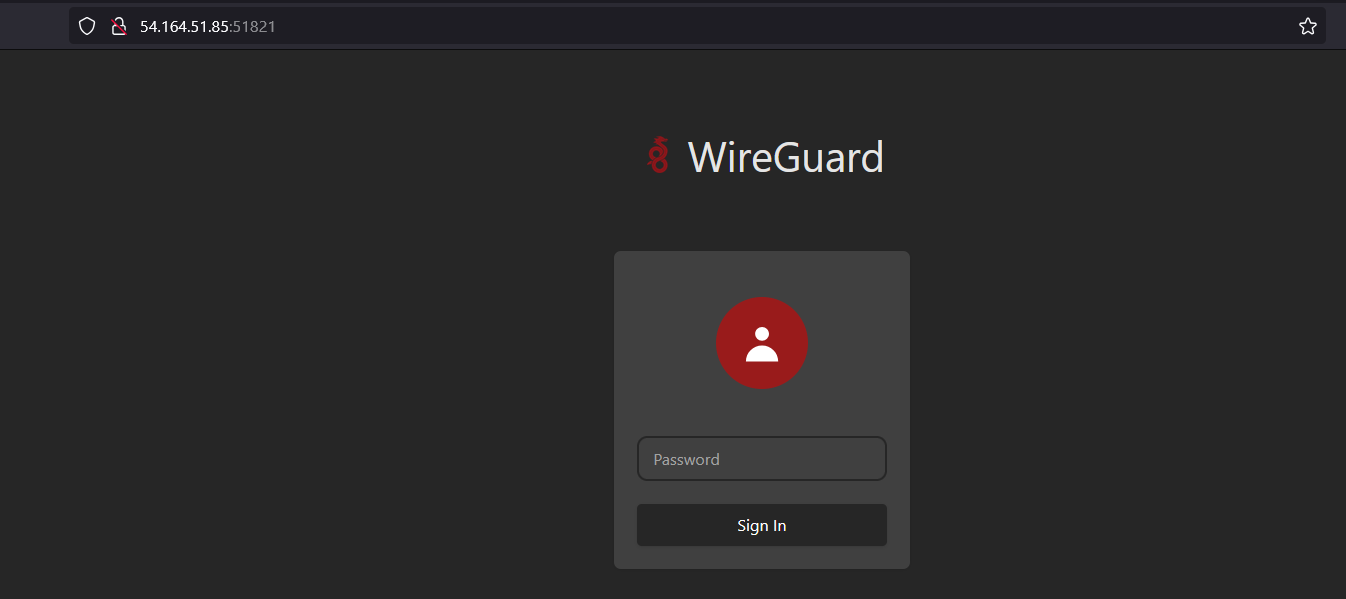
If you see a login screen, congrats—you’re officially too cool for school. If it’s broken, you probably fat-fingered the IP.
Click “New Client,” name it (e.g., “My Laptop”), and download the config file and import in wire-guard installer or scan the QR code.
1.9 Connect Your Device (The Fun Part)
Your client device (laptop, phone, whatever) uses that config file to join the VPN party. It’s like giving it a secret handshake to enter your network.
- Install WireGuard on your device (Google “WireGuard app” for your OS—Windows, macOS, Android, iOS, it’s everywhere).
- Import the config file you downloaded or scan the QR code in the app.
- Activate the tunnel.
If it connects, you’re basically James Bond now. If not, check your internet—did you pay the bill?
1.10 Test Your Super-Secret Tunnel
When connected, your device’s traffic flows through the VPN, letting you access your home network remotely.
On your client device, visit whatismyipaddress.com. It should show your server’s IP. Ping your server’s local IP (e.g., 192.168.1.x) to test internal access.
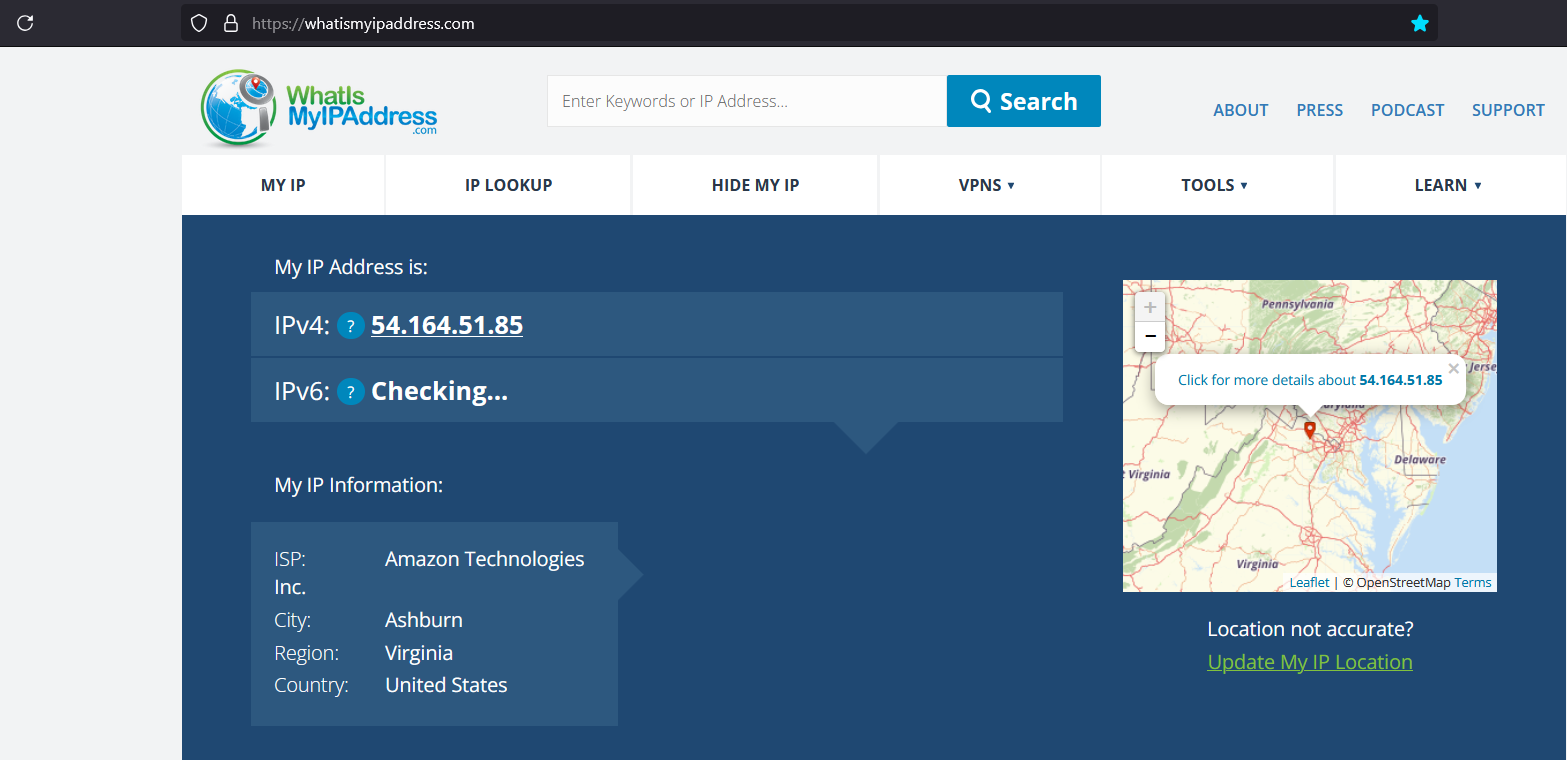
If it works, you’re a cybersecurity legend. If it doesn’t, you’re still cooler than the folks who don’t even try.
1.11 Optional Port Forwarding (For Home Warriors)
If your server’s behind a router (like at home), you need to tell the router to let VPN traffic in. This is port forwarding—fancy term, simple idea.
Log into your router (usually 192.168.1.1), find “Port Forwarding,” and add:
- Port: 51820
- Protocol: UDP
- Internal IP: Your server’s local IP (e.g., 192.168.1.100).
Sarcastic Tip: Router settings are a maze—good luck, Indiana Jones. Google your router model if you’re lost.
1.11 Bonus: Tell Your Audience Why This Rocks
- It’s fast (WireGuard is leaner than a supermodel).
- It’s secure (state-of-the-art encryption—hackers hate it).
- It’s easy (GUI means no nerdy command-line nonsense).
- Perfect for remote access to your Ghost blog or whatever else you’re hosting.